
vue中的10个生命周期函数
什么是生命周期
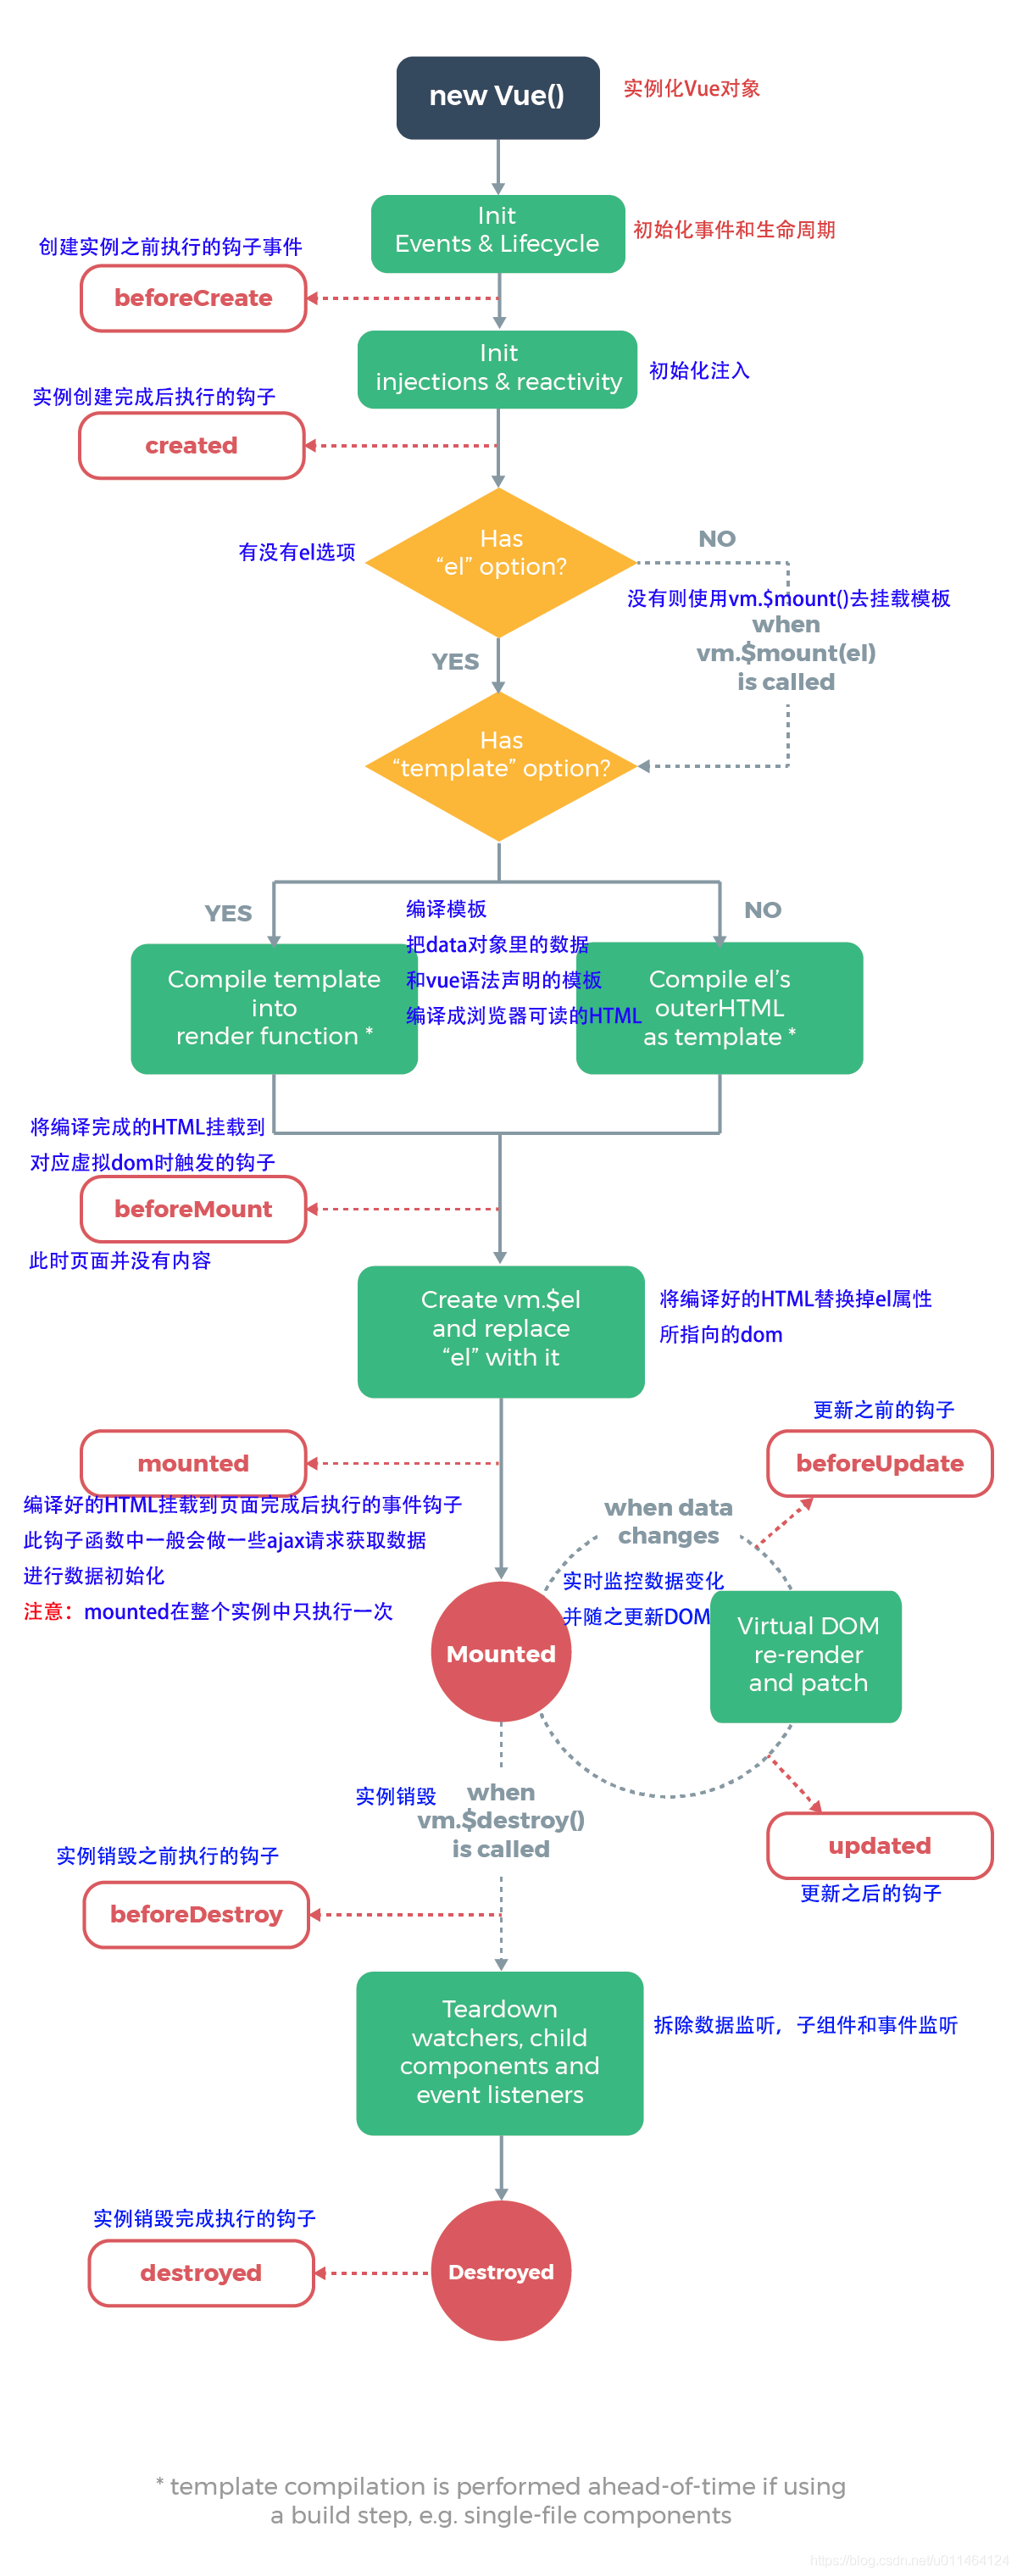
Vue实例有一个完整的生命周期,也就是从开始创建、初始化数据、编译模板、挂载Dom、渲染→更新→渲染、卸载等一系列过程,我们称这是Vue的生命周期。通俗说就是Vue实例从创建到销毁的过程,就是生命周期。
beforeCreate --vue实例创建之前
created --------vue实例创建之后
befoerMount-----DOM挂载之前
mounted --------DOM挂载之后
beforeupdate —更新之前
updated --------更新之后
beforeDestroy --组件销毁之前
destroyed ------组件销毁之后
activated-------组件激活
deactivated-----组件停用
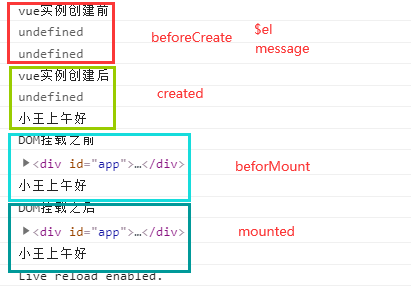
(1)created beforeCreate befoerMount mounted
<div id="app"> <h1>{{message}}</h1> </div>
  let vm = new Vue({
    el: '#app',
    data: {
      message: '小王上午好'
    },
    computrd: {},
    match: {},
    // created和beforeCreate
    // A 可以操作数据 B 数据没有初始化
    // beforecreate --vue实例创建之前
    beforeCreate() {
      console.log('vue实例创建前');
      console.log(this.$el);
      console.log(this.message);
    },
    // created --------vue实例创建之后(可以对数据进行处理)
    created() {
      console.log('vue实例创建后');
      console.log(this.$el);
      console.log(this.message);
    },
    // befoerMount-----DOM挂载之前
    // this.$el--此时的$el为“虚拟的”DOM节点
    beforeMount() {
      console.log('DOM挂载之前');
      console.log(this.$el);
      console.log(this.message);
    },
    // mounted --------DOM挂载之后
    // this.$el--此时的$el为“真实的”DOM节点
    mounted() {
      console.log('DOM挂载之后');
      console.log(this.$el);
      console.log(this.message);
    }
  })
beforecreate --vue实例创建之前
created --------vue实例创建之后(可以对数据进行处理)
befoerMount-----DOM挂载之前
mounted --------DOM挂载之后
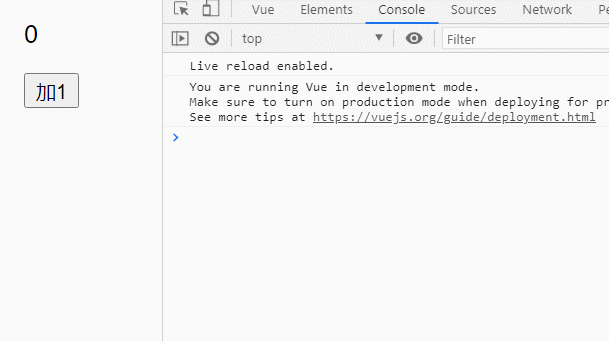
(2)updated 和beforeUpdate
A 可以获取最终数据 B 可以二次修改
<div id="app">
  <p id="number">{{num}}</p> <button @click="num++"> 加1</button>
</div>
let vm = new Vue({
  el: '#app',
  data: {
    num: 0
  },
  beforeUpdate() {
    console.log('数据更新前的状态-----');
    console.log(document.querySelector('#number').innerHTML);
  },
  updated() {
    console.log('数据更新后的状态-----');
    console.log(this.num);
  },
})
代码演示:
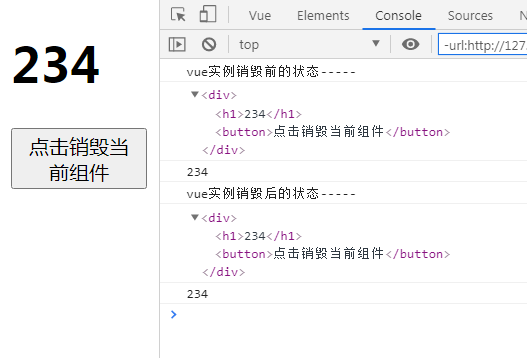
(3)beforeDestroy与destroyed
1、创建—子组件(子实例)
let Child = {
  data: function () {
    return {
      message: '234'
    }
  },
  template: ` <div> <h1>{{message}}</h1> <button @click="play">点击销毁当前组件</button> </div> `,
  beforeDestroy() {
    console.log('vue实例销毁前的状态-----');
    console.log(this.$el);
    console.log(this.message);
  },
  destroyed() {
    console.log('vue实例销毁后的状态-----');
    console.log(this.$el);
    console.log(this.message);
  },
  methods: {
    play: function () {
      this.$destroy();
    }
  }
}
2、创建根组件(根实例)
let vm = new Vue({
  el: '#app',
  data: {},
  components: {
    Child
  }
})
3、使用组件
<div id="app">
  <!-- 使用组件 -->
  <h1>{{title}}</h1>
  <child></child>
</div>
代码演示:
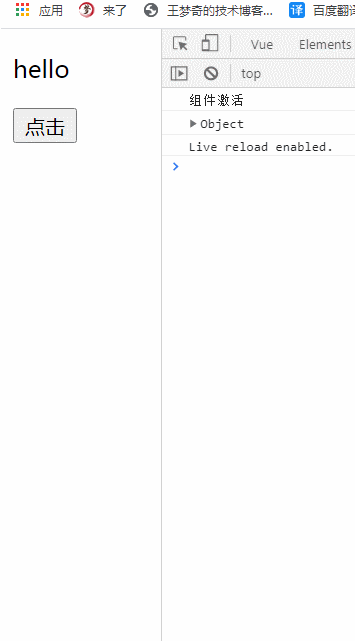
(4)activated和deactivated,一般配合有缓存的
1、创建—子组件(子实例)
  let Child = {
    data: function () {
      return {
        msg: 'hello',
        a: 1
      }
    },
    template: ` <div> <p>{{msg}}</p> </div> `,
    //组件激活
    activated() {
      console.log('组件激活');
      console.log(this.$data);
    },
    //组件停用
    deactivated() {
      console.log('组件停用');
    }
  }
2、创建根组件(根实例)
组件的激活和停用
let vm = new Vue({
  el: '#app',
  data: {
    show: true
  },
  methods: {
    run: function () {
      return this.show = !this.show
    }
  },
  components: {
    Child
  }
})
3、使用组件
组件需要用<keep-alive>来包裹
<div id="app">
  <keep-alive>
    <Child v-if="show"></Child>
  </keep-alive> <button @click="run">点击</button>
</div>
代码演示:
评论
匿名评论
隐私政策
你无需删除空行,直接评论以获取最佳展示效果